Pages

Avocado Phirni Recipe | Vegetarian | Indian Dessert | Flavour Diary

Avocado Phirni Recipe

 Today's recipe is simple easy dessert to make at home and best for parties, potlucks and any get together. To make it bit healthy i added Avocado and flavour of avocado has ruled the phirni. Make sure that avocado has to be rippen when used.Check out ingredients and direction....


Level: easy
total time: 30 hr
Serves:4

1 cup:250 ml
1 tablespoon: 15ml
1 teaspoon:5ml

Ingredients

Avocado: 2
Basmati Rice: 1/4th Cup
Milk: 4 cups(1 liter)
Sugar: 1/2 cup(Adjust to taste)
Cardamom Powder: 1/2 teaspoon
Almonds: 10 (crushed)

Directions
  • Wash and soak basmati rice in water for minimum 20 minutes.Grind rice 
  • In a pan add milk and bring to boil.
  • Then add mashed avocado, grind rice and cook for 20 minutes  on medium flame and stir in between.
  • Once the rice is cooked add cardamom powder.Crushed almonds and sugar and cook until desired consistency.
  • Refrigerate the phirni and then serve chilled and garnish with sliced almonds.
Tips
  • You can use vermicelli instead of ground rice.
  • Avocado should be rippen when used.
You might be interested in green recipes
Strawberry Spinach Smoothie

Bendakaya Velluli Karam (Okra Dry curry)

ABC Soup

Green Capsicum Chutney

Broccoli Tots


#AvocadoPhirni is going to be part of  81 #foodiemonday #HotandColdRiceRecipes #bloghop recipes

Zucchini Chana Dal Curry Recipe | Vegetarian | Indian | Flavour Diary

Zucchini Chana Dal Indian Curry Recipe

After coming to foreign land and getting adjusted to various things coming in daily life was common. Experience the new taste of this part of the world was amazing and i was explored by all new veggies and fruits which were rarely or not seen in India at all, from Brussels sprouts, Grapefruit, Dragon Fruit and many more and Zucchini was one among it. Zucchini is also know as Courgette is a summer squash and is widely available in yellow and green colors in the stores.
I love this vegetable as i can use up in any form like in salads, breads, or in chocolate cake to hide it or use it up in indian style like in  Dal Cha (its a tangy lentil curry accompaniment with rice) or in Chutney... yo i am using this veggie to full extent as we don't get regular Indian Squash near by.... I make many variations now and then but being a lazy person to capture the pic and publish but then here is my second recipe in curry way...check out the ingredients and easy steps to follow...

Level: easy
Cook time: 30 mins
serves:2-4

1 cup:250 ml
1 tablespoon: 15ml
1 teaspoon:5ml

Ingredients
Zucchini/ Courgettes : 500gm
Chana Dal/ Split Bengal Dal : 1/3 cup
Oil: 2 tablespoon
Onion: 1 medium
Ginger Garlic Paste: 1/2 tablespoon
Green Chillies: 2 (Split in half)
Mustard Seeds/Raya: 1/4 teaspoon
Cumin Seeds/Jeera: 1/2 teaspoon
Cumin Powder: 1/4 teaspoon
Garam Masala Powder: 1/4 teaspoon
Turmeric Powder: 1/4 teaspoon
Red Chilli Powder: 1/2 teaspoon (to taste)
Curry Leaves : 1 spring
Salt to taste
Fresh Chopped Coriander for garnish

Directions

Preparation:
Wash and Soak Chana Dal in warm water for 20 mins.
Wash and Peel the Zucchini and cut in 1 inch pieces or little smaller than that.
Cooking:
In a pressure cooker add soaked chana dal, 1/2 teaspoon of salt and water and pressure cook for 1 whistle.[Check tips for other option of cooking]
While your Chana Dal is cooking, take another pan, Add oil, when oil is hot add mustard seeds, when mustard seeds starts spluttering add cumin seeds, curry leaves, finely chopped onion.
Once the onion turns transperant add turmeric powder, split green chillies, ginger garlic paste and stir for a 30 secs . 
Now add Chopped Zucchini,Salt, chilli powder and stir for 30 secs . Cover with lid and cook on medium flame until zucchini is 3/4th cooked and now add the cooked chana dal without water, cumin powder, garam masala powder and mix well and chana dal water/normal water for desired consistency. Close the lid and cook till Zucchini is completely cooked.
Garnish with chopped coriander and serve hot with phulka, roti, or plain white rice.

Tips
*You can cook Chana Dal/ Split Bengal gram in a pan instead of pressure: take a pan add soaked chana dal ,salt and water(water should be 2 inch above the dal) and close the lid and cook on medium low with close lid. Cook until the dal is cooked( when you press the dal in between index and thumb it should be pressed not mushy)


You may also like to try other Vegetarian Curries  like.... 

Vegetable Jalfrezi
Carrot Cabbage Kofta

Kashmiri Dum Aloo
Dry Palak Moong Dal

Tawa Paneer Tikka Masala

Chickpea Chocolate Cake Recipe | Gluten Free | Flour Less Butter less| Flavour Diary

Chickpea Chocolate Cake Gluten Free Butter Less

 Here comes a special ingredient cake for all cake and chocolate lovers which is delicious and relatively healthy treat.And the key and special ingredient used in cake is Chickpea/Garbanzo beans /Cholay ... yes you read it right and the cake is super easy ,super delicious and super moist ... and is flour less , butter less and most of all no special equipment used. So this would be a one of the best way of feeding our kids some proteins with deliciousness.
I am not found of Valentines day and neither my hubby  so there is nothing too special on this day or for this day but when #foodiemonday team has decided for valentine treat for the dear ones...then i thought for some healthy snack for my elder princess with some chocolate as a key ingredient just like my healthy Chocolate Fruit Pizza ... she wanted cheese cake but then i was not in a mood to do that.... then i remember this cake which i saw looong looong ago in some old cooking show with chickpeas...then i searched on google and changed the ingredients according to my taste buds...
I love experimenting my cakes with different ratios and ingredients going in like my Finger Millet Ragi Cake, Custard Powder Lava Cake, Eggless cakes, Butter less cakes and many more...

Gluten Free Flour Less Butter less Cake Recipe


Level: easy
total time: 1 hr
Serves:12 ( 8 inch cake pan)

1 cup:250 ml
1 tablespoon: 15ml
1 teaspoon:5ml

Ingredients

Chickpea: 400gm (2 cups) (if using tin then rinse,drain and then measure and if using dry chickpea then use 1 cup dry chickpea then soak overnight, boil and drain the water and measure)
Plain Chocolate : 250gms
Eggs: 4
Brown/White Sugar: 150gm (3/4cup) ( i used brown to taste)
Baking Powder: 1/2 teaspoon
Orange Zest / Vanilla essence : 1 tablespoon ( i used Orange Zest)
Powder Sugar / Nutella Glaze/ Ganache for topping (optional)

Directions

  • Preheat the oven at 180 c . Grease the 8inch cake pan line with parchment paper and then grease again.
  • Chop the chocolate and melt in microwave in shots of 20 sec and mix in between and keep aside.
  • In blender/food processor dump in chickpea, sugar and blend until half smooth and then add eggs and then blend to smooth paste. Now add melted chocolate, orange zest and baking powder blend again until well combined.
  • Pour the batter in the prepared pan and bake for 40 mins or until toothpick comes out clean.
  • Transfer to the cooling rack and drizzle some chocolate /nutella glaze on it and serve .
Chickpea Chocolate Cake Recipe

Tips

  • Add chopped nuts in the batter to get some crunch in the cake.
  • You can go creative for toppings : like use powdered sugar  or chocolate/Nutella glaze or serve with some fruits or simply slice and gobble it up.
  • Instead of sugar you can use soaked dates or date paste to taste in the batter

Gluten Free Butter Less Chickpea Chocolate Cake

#ChickpeaChocolateCake is going to be part of  79 #foodiemonday #Valentinetreats #bloghop recipes
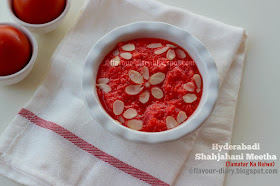

Hyderabadi Chicken kachi Akhni Dum Biryani | Hyderabadi Cuisine | Non Veg Recipes

Chicken Dum Biryani hyderabadi style

 Hyderabadi Biryani !!!! .... ooo god who can say no to this mouthwatering dish... In hyderabad dum biryani's is enjoyed at any time of the day from breakfast to dinner or any midnight carving too....
In India we have wide variations in biryani from veg to non veg .... but being from hyderabad i love dum style cooking for veg and non veg version of biryani's....  even  in dum style cooking we have two variations one kachi Aqni where marination is raw and cooked on dum (pressured steam ) and other is Pakki Aqni where marination is half cooked first and then given dum. Usually hyderabadi biryani uses whole spices and no extra spice mix is used in it...simple steps to make but needs practice to get perfection. Biryani is served along with raita and Mirchi ka salan.
Today's recipe is Kachi Aqni Chicken biryani where raw chicken is completely cooked on dum(pressured steam) ... check out the ingredients and instructions below.
You might be interested in other Hyderabadi deliciousness like


Level: Medium
Cook time: 40 mins
Resting time: 45 mins to 1 hr
Serves: 3

1 cup:250 ml
1 tablespoon: 15ml
1 teaspoon:5ml

Ingredients

Marination:
Chicken: 600 gm
Yogurt: 250gm
Red Chilli Powder: 1 tablespoon ( to taste)
Turmeric Powder: 1/2 teaspoon
Salt: 1 tablespoon (to taste)
Ginger Garlic Paste: 1 tablespoon

Preparing Rice:
Basmati Rice: 600 gm
Cloves(loung): 2-3 
Cinnamon stick(dalchini): 1 inch
Cardamom(elaichi): 2
Caraway seeds(shahi jeera): 1/2 teaspoon
Star Anise : 2
Bay leaf: 1 or 2 
Mint leaves: 1/2 cup
Water for boiling
Salt to taste

Assembly Ingredients:
Oil: 4 tablespoons
Green Chillies: 2
Chopped Coriander: 1 cup
Chopped Fried Onions: 2 large(Fried onion section in Directions)
Lemon juice: 1 tablespoon
Ghee: 1 tablespoon
Water: 1/4 cup
Milk + Food Colour : 1/4 cup


Directions

Marination
Wash the chicken and In a bowl add all the ingredients in the marination list and set aside for at least an hour  but overnight in freeze is best. When you do taste test it should be little salty and hot to your taste buds.

Fried Onion
Chop the onion length wise and deep fry them until they are golden brown and crispy.

Preparing Rice:
Wash and soak the basmati rice for minimum 30 minutes.
In a big bowl add water generously along with other ingredients in the list( cloves,cinnamon...) for boiling.
When water starts boiling, add the soaked rice into it. When you taste the water it should be salty.
Cook the rice until it is three fourth done stir in between it will take approx 7-10 mins.
Strain the rice completely and keep it aside. 

Assembling the biryani:
Take thick bottom pot (i used pressure cooker), add oil and spread over the base and then spread the marinated chicken over it.
Now spread 3/4th fried onions over chicken.
Spread 3/4th cup chopped coriander, mint leaves  and green chillies over fried onion.
Now spread prepared rice over fried onion.
Now on top of rice spread remaining fried onions, chopped coriander, mint leaves.
Add lemon juice, Milk+orange food color, ghee and water (optional... if your drained rice is too wet then skip water) over the rice.
If you using pressure cooker then just put on the lid with no whistle ... If you are using a pot then take chapathi dough and seal the lid  and pot tightly.
Cook the biryani for 10 mins on high and 15 to 20 minutes on low.(or simply cook for 40-45 mins on low)
Best way to take biryani out is take big long spatula take the biryani out from one corner... the spatula has to go bottom of the pot and take the rice and chicken out at a time... and serve it on the plate along with raita and easy mirchi ka salan.


Tips
Instead of food color you can make use of saffron in water.


Hyderabadi chicken kachi yakhni dum Biryani


#HyderabadiChickenBiryani is going to be part of  3 #MFBC #bloghop recipes


Kashmiri Kong Kahwa Tea Recipe| Kashmiri Cuisine | Weight loss Recipe | Indian Beverage | Flavour Diary

kashmiri Kahwa recipe

 Kashmiri kahwa tea, is generally prepared from Kashmiri green tea leaves, in which spices like saffron, cinnamon, cardamom are infused and kahwa is usually served in transparent cups with sprinkles of  almonds and walnuts. Kahwa is sweetened by sugar or honey and i skipped the sweetener as i don't use sugar in my tea or coffee ( don't think i am diabetic, instead i am have big fan of desserts and sweets hehehe).
Kashmiri Kahwa is traditionally prepared in a brass kettle known as a samovar, which has a central cavity to place live coals and a space for water and the ingredients to boil.
PC: Google Images
Kahwa is good for digestion after a heavy party food  and aids in weight loss .... and because of spices used its a perfect home remedy for flu, cure chest congestion, severe cold and even headaches!. Depending on the spices used kahwa tea has its own flavor, taste and aroma. For special occasions, a few saffron (called `kong' in Kashmir) strands are added to it, and the tea is known as kong kahwa.
Kahwa is quick and easy recipe with few ingredients getting in to it to make it aromatic tea...


Level: easy
total time: 6 mins
Serves:1

1 cup:250 ml
1 tablespoon: 15ml
1 teaspoon:5ml

Ingredients

Water: 2 cups
Sugar/Honey to taste (optional and i skipped)
Green tea: 1 bag ( Use kashmiri green tea if available) 
Cinnamon : 1 inch stick
Cardamom: 2
Saffron Strands : 1 pinch
Dry Rose petals: few
For Garnish you can used sliced almonds, chopped walnuts

Directions

In a saucepan add water and rest of the ingredients except green tea bag. And on medium high heat let the water comes to boil and let it boil for 2 or 3 mins and then add green tea bag and boil it for 1 or 2 minutes more.
 Strain the tea and serve with sliced almonds or chopped walnuts or simply skip the garnish and serve hot.

Tips
If you are using Honey as sweetener then add honey to taste just before serving.
weight loss recipe

#Kashmirikahwa is going to be part of  78 #foodiemonday #regionalcuisine #bloghop recipes