Nimbu Ka Achaar -- Indian Style Lime Pickle


Two days back, here in UK the place where i live had a shower of hail stones and still we are having our jackets on. Here we are eagerly waiting for sun to show up. But back in India, Sun is showing all its hotness by making new recording temperatures this year. I personally suggest all my family and friends to be hydrated to beat the heat.  
One most interesting thing which most of people in Summer is to make and taste new pickles. Thats so yummy thing to do.Pickles are always a compliment to the food in south india, we have it along with curd/yogurt rice or with any breakfast or with roti or any thing which we want to make it spicy. In north india we add some sweetness to the pickles .... but in south we like full of spice.  Every house has its own variations for pickles and taste. So if you start searching for a pickle (achaar), you we will loaded with tons of variations.
Todays post is lime/lemon pickle which is not too spicy but its tangy that your mouth get watery.Its simple to make and uses quite few ingredients.


Ingredients

Pickle:
Limes (yellow) : 9 
Salt: 4 tablespoons
Red Chilli powder: 3 tablespoons
Lime Juie: 3 tablespoons
Turmeric Powder: 1 teaspoon

Tempering:
Oil : 4 tablespoon
Mustard Seeds: 1 teaspoon
Cumin Seeds: 1 teaspoon
Dry Red Chillies : 2 (broken in half)
Asafoetida: 1/4 teaspoon


Directions

Preparations:

  • Wash and clean the limes with dry cloth. Let it completely dry.
  • Cut each lime in 8 pieces. And deseed it.
  • In clean dry jar, pop in limes,lime juice, salt and turmeric powder and shake well until completely mixed.
  • Shake this jar twice a day for a week.
  • Then add Red chilli powder and keep it for a 3 -4 days. Shake twice a day.
Time for tempering:

  • In a pan, heat oil and add mustard seeds. After mustard seeds start to crack add Red chillies, cumin seeds and at last add asafoetida. Turn off the heat.
  • Let the mixture cool and then mix it with the pickle.

Tips:

Always make sure your jar and limes are dry before you proceed your process and mix it twice a day.
You can increase your spice and salt at any point. 


Yummy...then let set pickle it

Read More »

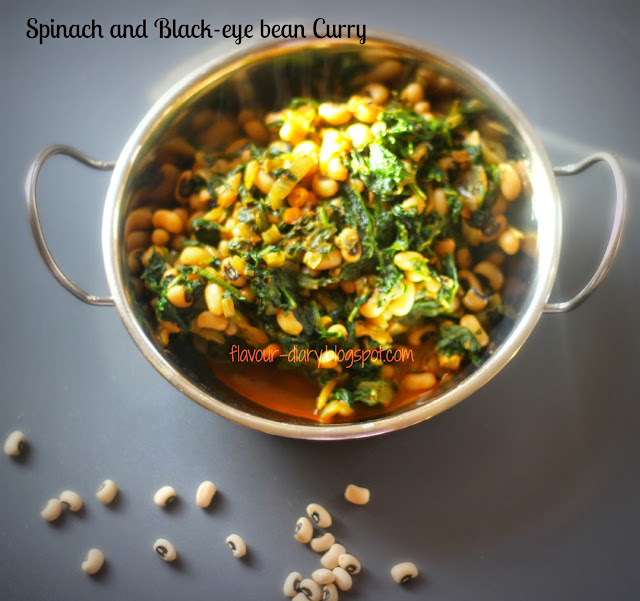
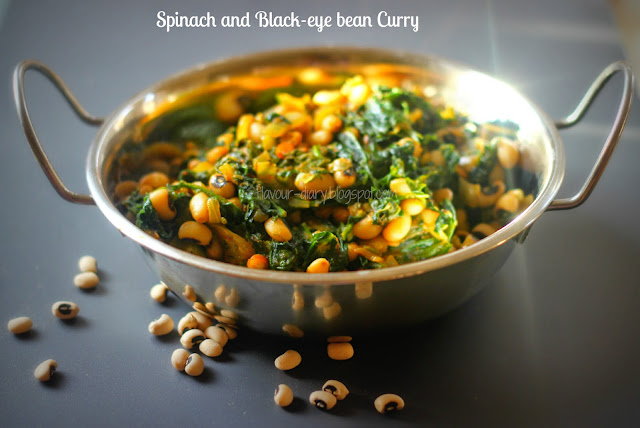
Spinach and Black-eyed bean Curry (Palak Lobia)


After a long time its been sunny today with clear sky all day, otherwise its been rainy and cloudy most of the time even though its end of spring. I was late in making dinner  but even then i was able to capture few good pics with natural light. Hope to have 
Spinach is always my favourite leafy veggy , which i combine with everything like lamb (palak ghost) , cottage cheese and with all beans for mains. And spinach is one of the best leafy veg to increases blood count. And Beans are good source of proteins and  an alternative for vegetarians. 
Todays post is packed with Iron and proteins. This is one common recipe for me in daily cooking, its easy, no stress, tasty and goes well with both rice and roti's. With no further delay lets check the process.....


Level: Easy
Total time: 30 mins
Soaking time: 4-5 hrs
Serves: 2-3


Ingredients

Spinach/Palak : 200 gm
Black-eyed beans: 100gms
Onion: 1 medium
Cumin seeds: 1 teaspoon
Split chana Dal: 1 teaspoon (optional)
Dry fenugreek leaves / kasuri meethi: 2 teaspoon
Chilli powder: 1 teaspoon ( to taste)
Oil : 3 tablespoon
Salt to taste

Directions

Preparations:
Soak beans for 4-5 hrs.
Chop Onion and spinach.


method:
Pressure cook the soaked beans with little salt and a cup of water for 3 whistles.
While your beans are cooking, chop up onions and spinach.
Take a pan add oil, when it is warm add cumin seeds and split chana dal. Then add Onions, salt and fry until transparent.
Add spinach and stir fry on medium flame for a minute and then add cooked beans along with water.
Add Red chilli powder, roasted cumin powder and coriander powder and crushed kasuri meethi. Fry till desired consistency.


Tips
  • Use boiled water in rasam or any other curries. 


Wanna try....let set go..

Read More »

Russian Salad Recipe | Flavour Diary


Salad!!!.... oohoo i was never found of salads as a kid and eating raw veggies was always stated as "ghass phoos"(i mean grassy things) . For me salad meant to be cutting some veggies like carrots, cucumber and onions and decorating on the plate...if possible have along with your dinner...hehe.. But after marriage , and i getting exposed to the culinary world in full stretch, i found out there is many more varieties of salad which were taster and healthier too..So now i can proudly say that i love salads. 
By the way this salad was introduced by my friend Nabby in London. She is very friendly and dear person to me just like my little sister.When i had it for first time i finished the box of salad all by my self... for dinner.. i mean no dinner only salad. Its just mouth watering. 
Its a combination of veggies and fruits of your choice. I found it to be great way of eating veggies and fruits. Its easy to make, no stress, no fuss and delicious to have it at any time of the day...yum yum...just boil your veggies, chop your fruits and mix rest of the ingredients...tada... your salad is ready..isn't it easy... Serve cool....

I always make this for small gathering and it is loved by everyone. Its a great party food, you can make a day before the party and keep it in the fridge and it is always a great hit in the party. With all this blah blah .... about the dish... you may surely wanna try out... so here is the process....


Level: Easy Peasy
Serves: 2-4


Ingredients

Carrots, Peas, Beans,Corn : 2 cups (Frozen)
Apples: 2 medium
Oranges: 2 medium
Potato: 2 medium
Black Pepper: to taste (taste should be mild)
Mayo/mayonnaise: 2 -4 tablespoon (to taste)
Fresh Cream: 4 tablespoon (1/4 cup) 
Sugar: 1 teaspoon
Salt: pinch


Directions

Peel potatoes and chop your veggies in bite size.
Pressure cook all your veggies by pouring 1/2 cup of water for 2-3 whistles, or until your veggies are just cooked but not mushy. Drain off the water and Let it cool completely.
Peel apples and oranges and chop them same size of your veggies

In bowl add fruits, veggies, salt,pepper, mayo and cream and mix well until well combined.
Serve Cool...

Tips
  • Increase or decrease your quantities according to your tastebuds, but the salad has to be mild.
  • You can even add pineapples for more tangy flavours.
  • Water you drained can be used in curries or rasam.
Read More »

Balushahi / Badusha


If you are on the foreign land, its always that you miss everything you did on the mother land, i mean playing, eating to work. I miss the most when i visit indian store where the cashier place is surrounded by indian desserts by seeing it i always miss mithaiwalas in india. I just remember when my dad n me go to mithai(sweet) shop, there are so many varieties and colourful sweets displayed that its impossible to select one and order. We go for mixed version of sweets in the box and here comes one of the sweet from the box to the blog... 

Its been ages that i made or tasted these beauties...i was just waiting to have a hand on it, but you know time time time has to come for every task to be completed..hehe... At last i did it for a friends get together. By the way these beauties are called as badusha or balushahi. These are flaky indian doughnuts dipped in sugar syrup.If you are diet conscious then keep out of your reach, because we use loads of butter.You can find them in two shapes, on with round and indent in the middle and the other round with spiral edges. I couldn't capture the spiral edge badusha , by the time i was planning to take a pic of it , it got completed.. 

I couldn't capture step by step pic as i was accompanied by my little helper IZ, i should be thankful to her for helping me in the kitchen. She did measuring, mixing, rolling ... oo i should say almost everything except frying. Earlier we both had fun in making chocolate dipped strawberries. I should say cooking with kids helps them in improving their mathematical and motor  skills, and off course you will have lot of cleaning. 


Makes: 12
1 cup = 240 ml

Ingredients

For dough
All purpose flour/maida : 1 and 1/2 cup
Melted butter/ghee: 4 tablespoon (1/4cup)
Yogurt/curd: 1tablespoon
Sugar: 1/2 teaspoon
Baking Soda: 1/2 teaspoon
Water: 2 tablespoon (adjust to form a dough)
Oil for frying

For syrup
Sugar: 3/4 cup
Water: 1/3 cup
Cardamom/elachi crushed: 2 (1/2teaspoon of cardamom powder)
Saffron a pinch (optional)

Directions

Badusha:

  • In a bowl add melted butter,sugar mix well until dissolved.
  • Mix baking soda and flour, add it to butter along with yogurt. The texture of the mix will be crumbly, add water 1 tablespoon at a time and form a soft dough.
  • Rest the dough for 15 mins, then start kneading it for 5 mins.
  • Make small lime sized balls and press in between the palms to make small circle and then mark a hard press  at the center with thumb, this would look like a mini doughnut.
  • Heat the oil until it is warm and then drop the badushas in it. Fry it on medium low heat until they are golden brown on both sides. Don't worry, if you see lots of bubbles around the badusha after you dropped in the oil.It will take approximately 8 mins. 


Sugar syrup:
While your Oil is getting heating up,Take a small pan, add sugar and water. Bring it to boil and lower the heat and add crushed cardamom pods or powder and keep it for 5- 10 mins to get 1 string consistency.
You can check  1 string consistency in two ways
1. Dip the spoon and lift it up the last drop should drop slowly with a string to it. Take off from heat. I found this is easy way to test.
2. Take a small plate and fill with little water, then drop a drop of syrup on it, then collect the drop in water with hands, if it forms a ball, then its ready. Take off from the stove.

Dip Badusha's in Syrup:
Once badusha's are golden brown remove from oil and place it on the kitchen paper. And transfer 2 or 3 to sugar syrup and coat the syrup on all sides. Place for approx 1 min. Shake of the excess and then transfer to the plate.


Tips

  • R your badusha dissolving in oil while frying then add little more flour to the dough and knead it and try again. Don't add too much of flour as badusha will loose flaky texture and they will become crispy :( .
  • Don't get in hurry for fry your badusha's, as they will be undercooked in side. 
  • If you want a traditional shape of badusha then take the small ball of dough and pinch at one end and twist it inside, do this to complete a spiral all around the ball

Wanna try....let set go..
You may also like to browse other dessert and here are few to list
Sheer Khurma

Sweet Corn Halwa

Chocolate Cardamom Sandesh

Coconut Moong Dal Halwa Truffle


Read More »

5 Easy ways to Decorate your Cake with Fresh/Whipped Cream


Cakes are always the favourite thing for any occasion or just like that. During childhood or even now my eyes pop out and i go crazy with the taste and design of cakes or pastries in a bakery.  Now a days beautifully crafted fondant/sugar paste base cakes are becoming popular, even i love to do some crafting with those fondant base cakes but .... if you go taste wise i love love fresh cream cakes a lot, as i can munch it as how much i want. Its not that these fresh cream cakes are not beautiful but it has its limitations to it. 

We have many types of icings available in market or can be made easily at home, which are used in cake decorating. All have their pros and cons with decorating or in taste. I always go by taste.... so i go for fresh cream....which is less in calories compare to our buttercream and fondant cakes. Before blogging i never used to take pics of the cakes which i baked for family and friends, so pics you see in this post would look less attractive but my motive is to show you how easy it is to decorate with fresh cream. Please note that it always needs practice and time for decoration but it's easy to decorate.

I don't want to make the post too lengthy or boring, so just sharing 5 ways to decorate your cream cake.....

With Nuts
First one would be with Nuts, I don't want you go nuts with your cakes but i want to make use of nuts (ground nuts, walnuts, almonds or your favourite one) hehe bad joke. If you are using ground nuts, then dry roast them, remove the skin and roughly chop them. With almonds and walnuts you can roughly chop them or use it as a whole. I used flaked almonds for decorating the cake in the below pic. 


With Fresh Fruits

You can even decorate the cakes using fresh seasonal fruits or even make use of your favourite canned fruits. Is that not interesting way to make your kids eat fruits along with cake and cream.Get creative while using the fruits.... even if you are not creative the cake will look gorgeous anyhow.

Chocolate shavings or cocoa powder
Grate some good quality chocolate and spread all over the cake and sides. Or even dust some cocoa powder with some pattern also works great. Our famous black forest cake is a combo of cherries and grated chocolate, simply beautiful and tasty cake..yum yum..


With piping tips

Not all piping tips are suitable for whipped cream as the cream will loose its stability at higher temperatures, so i always so for open/close star, round and leaf tips in common.I made use of star tip to pipe round the cake and spiderman logo with small round tip...tada a cake for a little super hero...


Desiccated coconut
Sprinkle the desiccated coconut on to cake as it is or you can dye the coconut with your desired colour and use it. OOpsy i don't have a pic of it, but it is one of the way to decorate, it looks beautiful too.


Hope it helped you in giving an idea for your next cake  to be decorated. Follow me for more cake tips in future. Happy baking....... 

Read More »

Savoury bites (Namak Paare)

Namak paare is a pastry seasoned with carom or cumin seeds.This mouth watering snack uses very few ingredients and can be stored up to a month in an airtight container. Fresh you eat taster it is. 
You may also like to check other savoury treats from india
Egg Puffs (Kids Version)
Beetroot Pakoda
Hyderabadi Dahi Vada
Lauki Ki Puri


Level: Easy
Prep time: 5 mins + resting time (15 min)
Cooking time: 15 mins

Ingredients
All-purpose flour  1 cups (120g)
Salt 1/2  teaspoon (3g)
Ajwain(carom seeds) - 1/4th teaspoon
Oil  - 2 tablespoons (30ml) + for frying
Water - 2 1/2 tablespoons (37ml) approx

Directions
  • Rub Ajwain in between the palms and mix with flour,salt and oil (2 tablespoons). Mix until breadcrumb consistency.
  • Add water little by little to form a hard dough.
  • Rest the dough covered for 15 mins, you will find white spots on it. white spots are nothing but salt granules  :-) 
  • Knead the dough and divide into 3 balls and roll to thin chapati and cut it into desired shapes.
  • Heat the oil, drop the squares into medium hot oil and remove when light brown.

Tips

  • Use oil for rolling the dough. If flour is used for rolling then while frying dusted flour will be sinking to the bottom.
  • Drop a small piece of dough in oil, if it sizzle and floats slowly then you can add the rest.
  • If oil is hot then namak paareys will be soft.


Read More »